The Internet of Things landscape is constantly changing. New devices, new protocols, and new providers are popping up every day. One new service that i’m excited about is Golioth. So much so that I’ve partnered with them to make the nRF9160 Feather as a reference device for the platform!
Golioth wants to be the go-to IoT infrastructure for any project spanning across operating systems and languages. The idea being, if your device has a link to the internet, it can work with Golioth.
They’re utilizing some technologies that I’ve been a fan of for a long while including CoAP over DTLS and CBOR. While the IoT world has been slow to pick up on these technologies, Golioth’s adoption will surely help speed things up!
In this post, i’ll be discussing how to get Golioth working with the nRF9160 Feather on Zephyr. We’ll be focusing on getting GPS sensor data and publishing it while using Golioth’s LightDB to control update interval and more.
Let’s get started!
Getting Started
All the code from this demo is located on Github here.
Setup
-
Install the VSCode Extension and SDK.
Here are the links for each operating system:
-
Initialize your repository using this Git url:
https://github.com/circuitdojo/nrf9160-feather-examples-and-drivers.gitand the Zephyr Tools: Init Repo command
Note: It’s best to select an empty folder to initialize the project to.
-
Sign up to download Nordic’s SUPL library here. Then, install using the instructions provided with the download package. (Files downloaded should be placed in the
nrf/extfolder.)Note: If you’re not familiar, the SUPL library download supplemental GPS data from Google’s SUPL server which increases the speed of getting a GPS fix. Without it it takes a much longer time (>60 seconds) to get a first fix.

Nice! You’ve downloaded and installed all the necessary bits to get this example working. In the next section, we’ll work on provisioning your device’s PSK so it can connect to Golioth.
Provisioning your device
There are a few ways of setting up a device. In this post we’ll focus on creating a device using Golioth’s connsole.
-
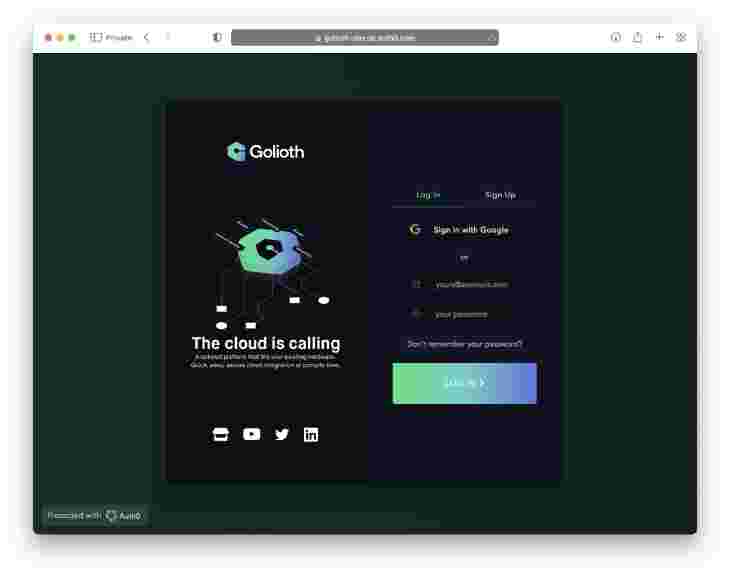
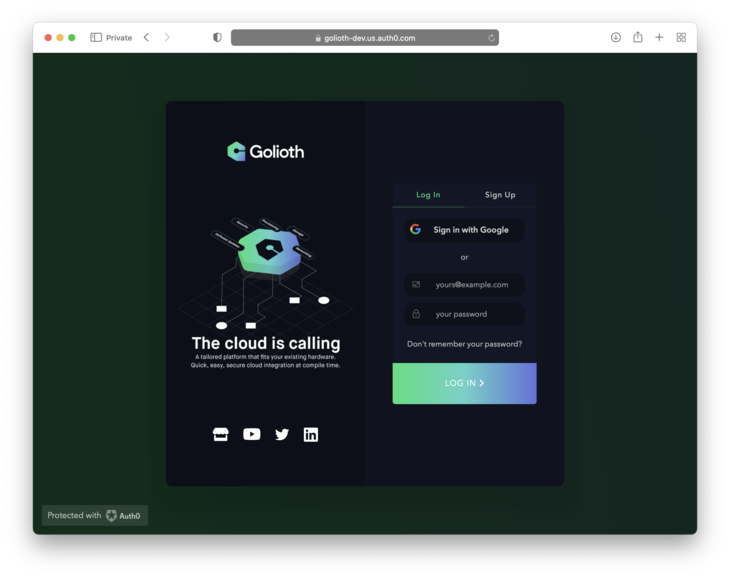
First, make sure you created an account and can log into console.golioth.io.
-
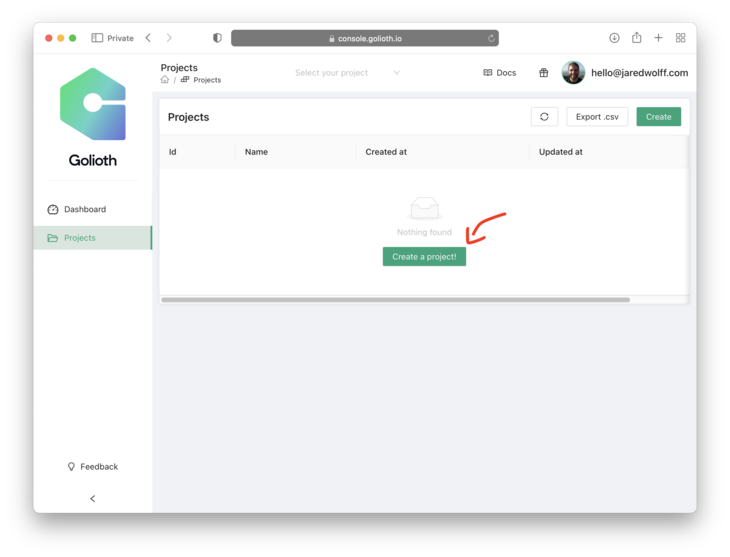
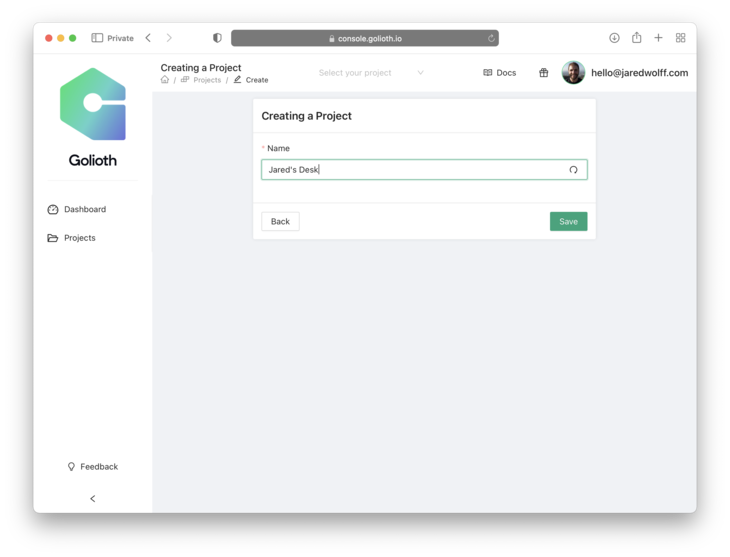
Next, create your first project. You can call it whatever you’d like.
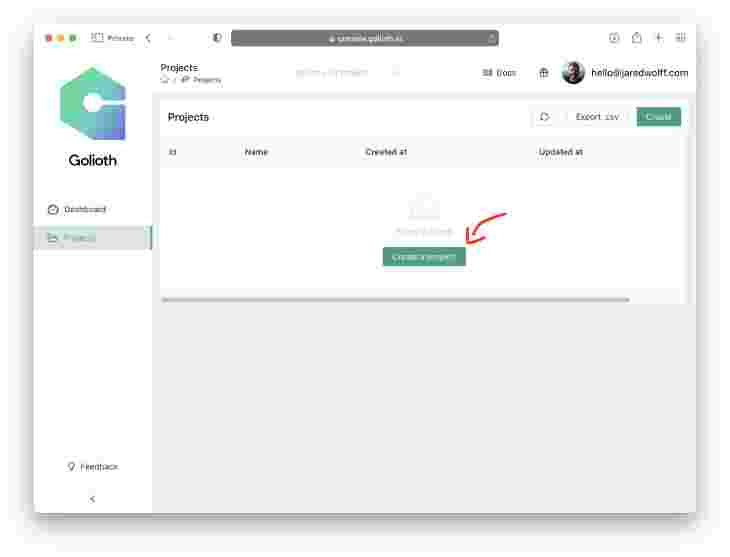

-
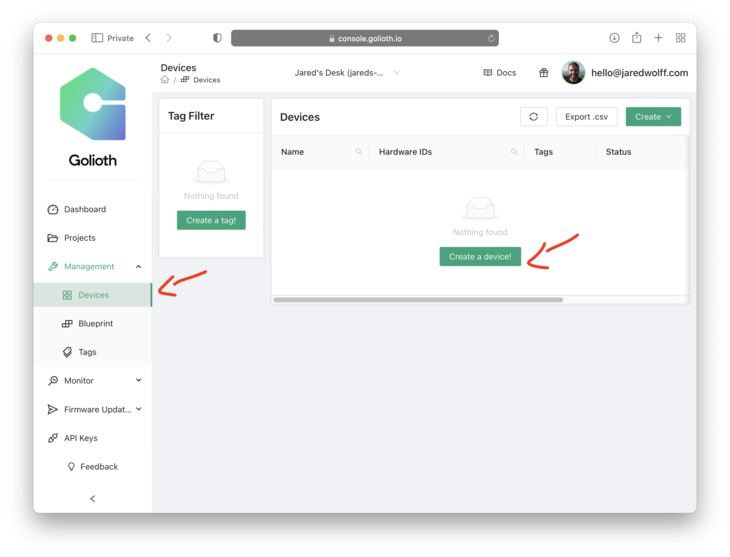
Next create your device.
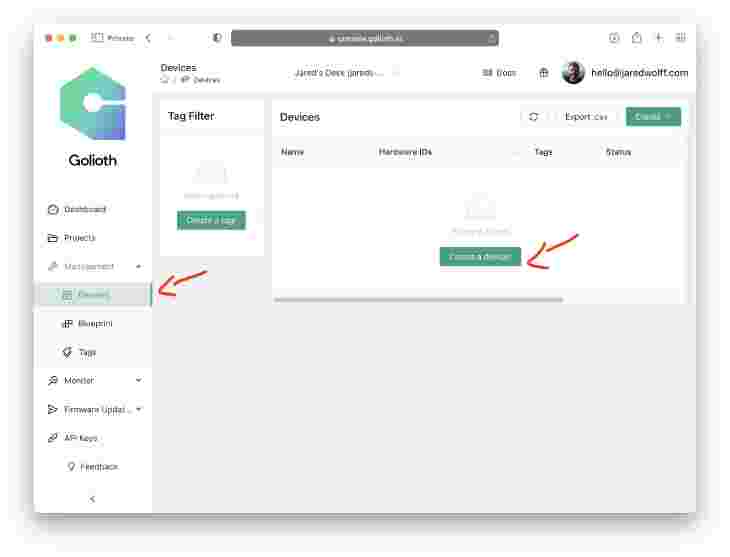
-
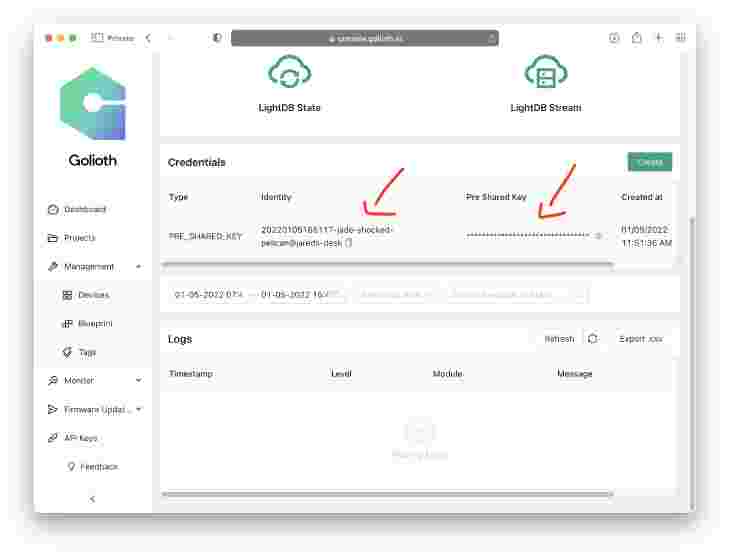
In the end you’ll be forwarded to the device page once it’s created. It should look something like this:
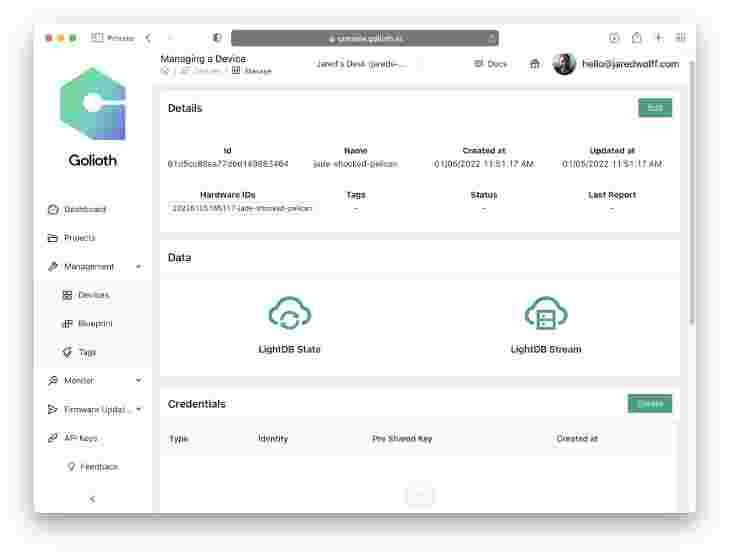
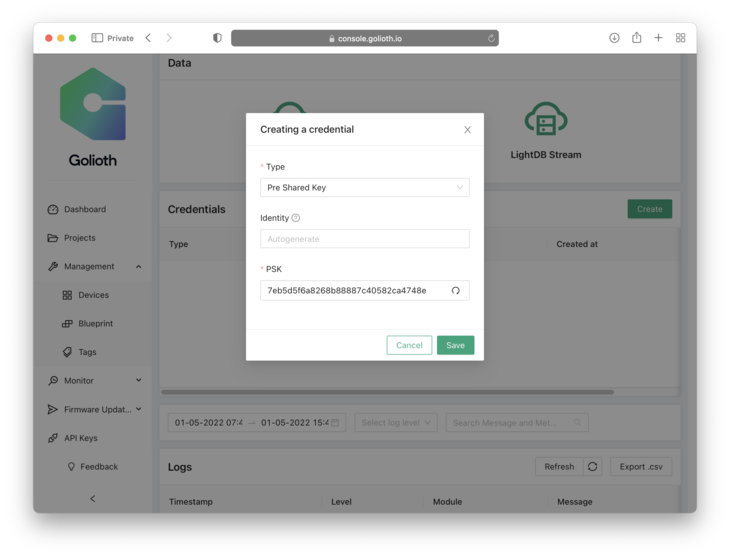
-
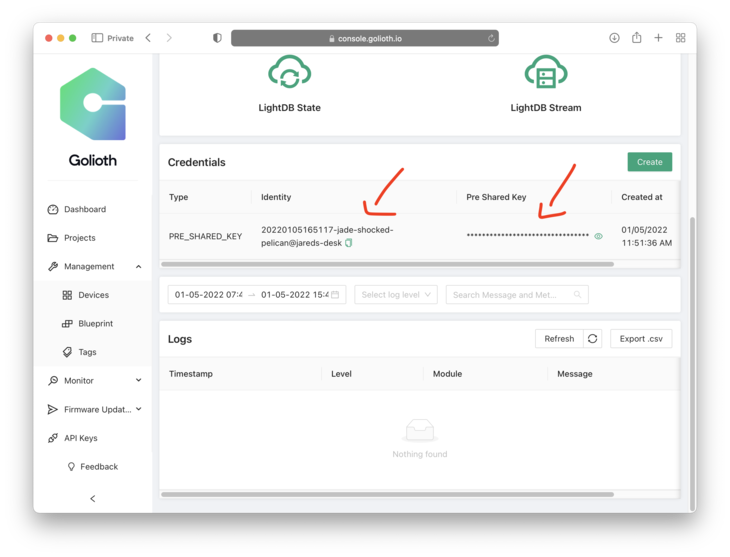
Finally let’s create the credentials. You’ll need these momentarily!
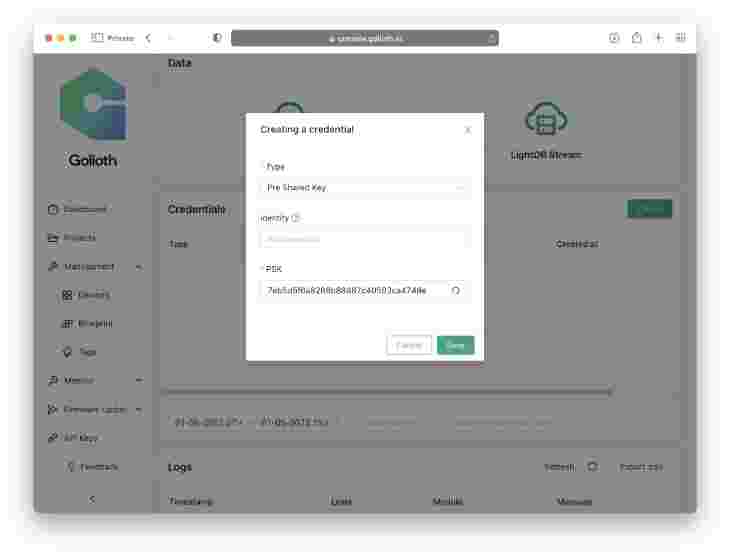
Take special note of the Identity and your Pre-Shared Key (PSK)

Loading credentials
The current best way to provision your device is by loading the at_client
sample first, then run the following commands and then continue loading the
tracker sample.
-
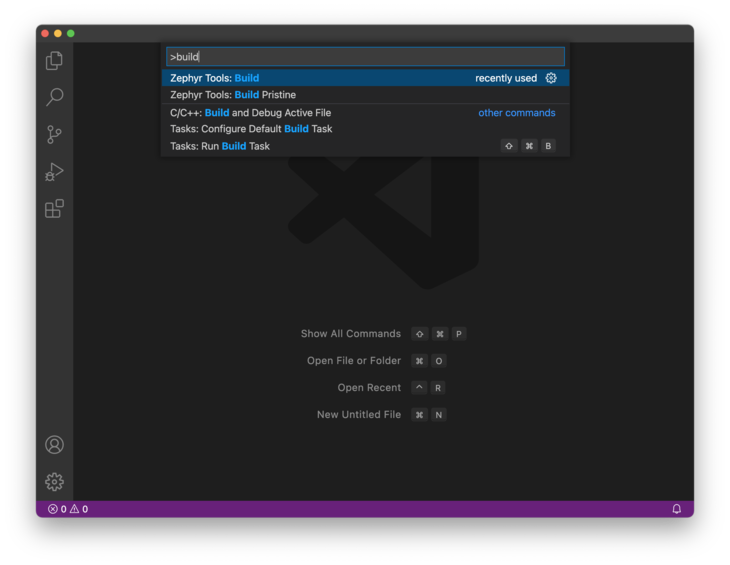
Open the command prompt by hitting CMD + SHIFT + P on mac or CTRL + SHIFT + P on other platforms. Then run
Zephyr Tools: Change Projectand selectat_client.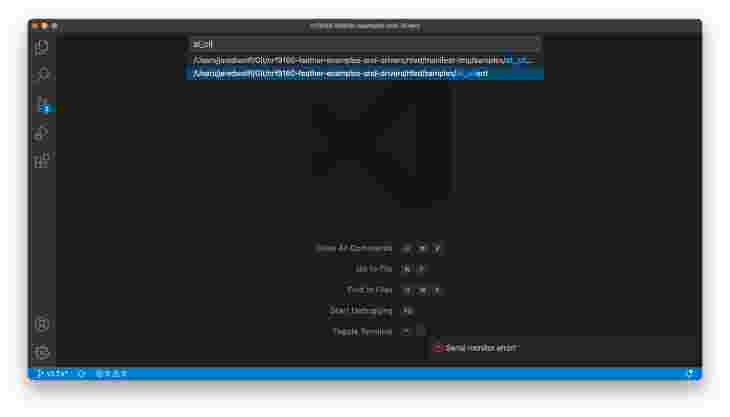
-
Then build using
Zephyr Tools: Buildcommand.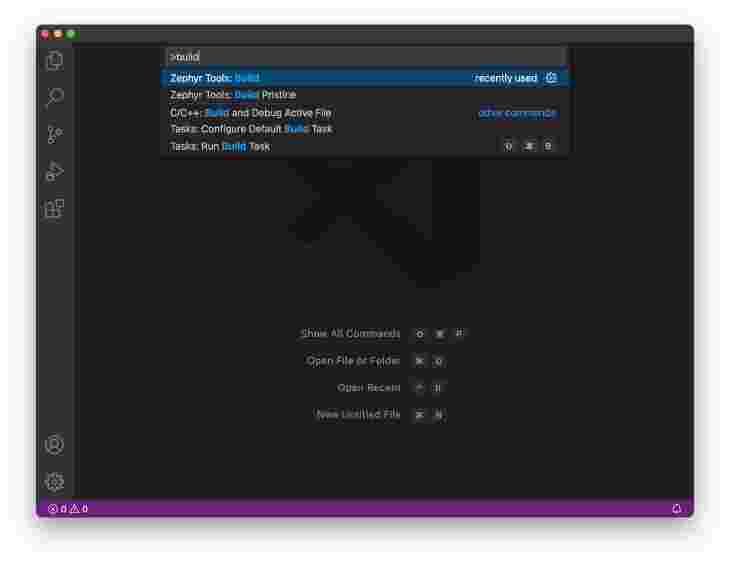
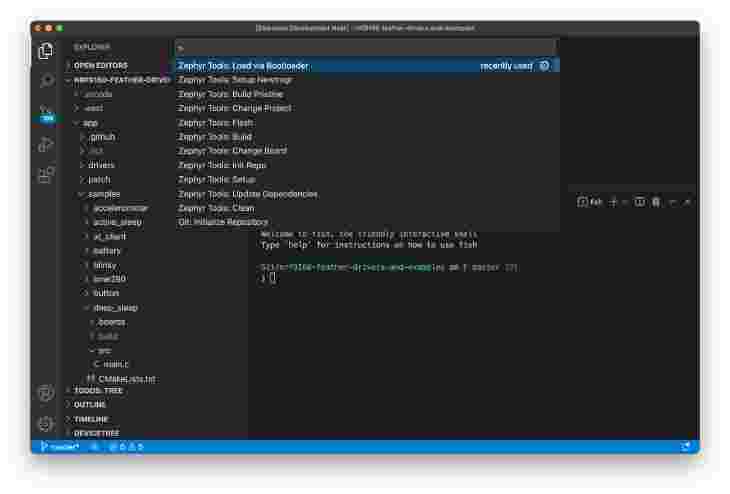
-
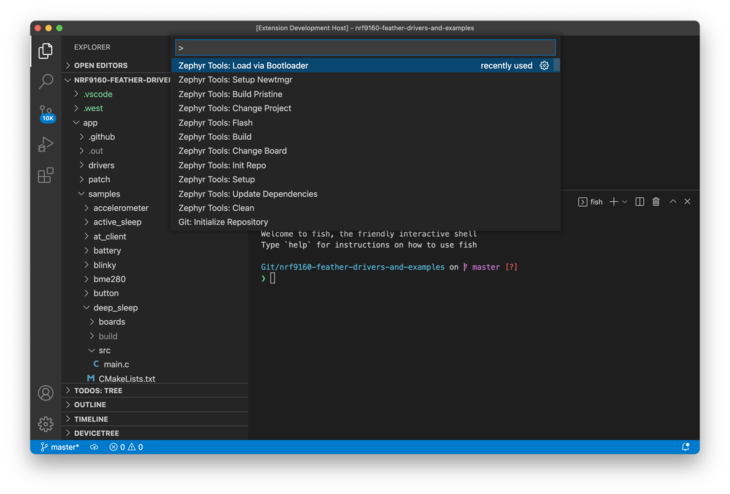
Then, load using the Zephyr Tools: Load via Bootloader task.
Note: make sure the device is in bootloader mode first
- Hold the MODE button
- Then tap the RST button while holding mode
- Hold the MODE button until the Blue LED illuminates
Then, load it!
-
Typically you would hard code the credential ID and PSK using a
.conffile. Since we’re using the SUPL client we need to store them in the secure credential store built into the nRF9160. Since the credential store requires your PSK stored in a hex string format, let’s convert it first:❯ echo "super secret password" | tr -d '\n' | xxd -ps -c 200 7375706572207365637265742070617373776f7264You can also use a site like this one to convert it first.
-
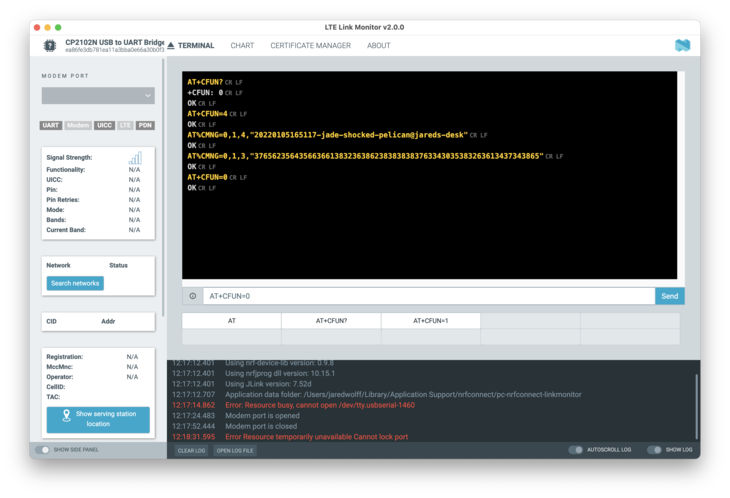
Then opening a terminal or LTE Link Monitor you can execute the following commands one at a time:
AT+CFUN=4
AT%CMNG=0,1,4,"<DEVICE IMEI>"
AT%CMNG=0,1,3,"<HEX STRING PSK>"
AT+CFUN=0
Important note: your PSK must be in hex string format. You can use a site like this one to convert it first. Make sure you select Output delimeter as None.
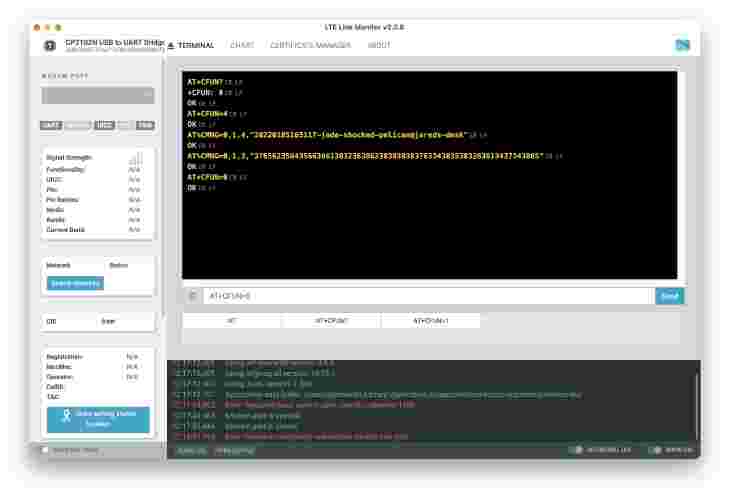
Make sure you enter the device IMEI and hex string PSK exactly otherwise your device will fail to authenticate with Golioth!

Building and flashing the code
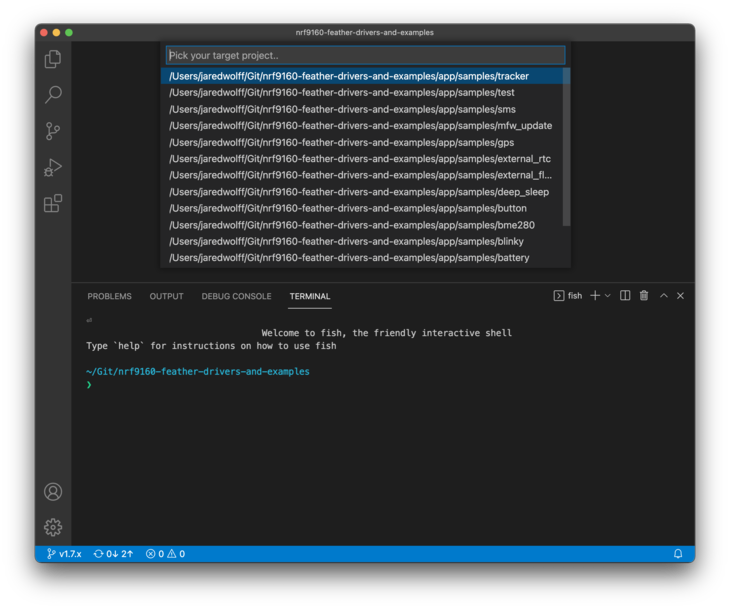
Using the command window run Zephyr Tools: Build
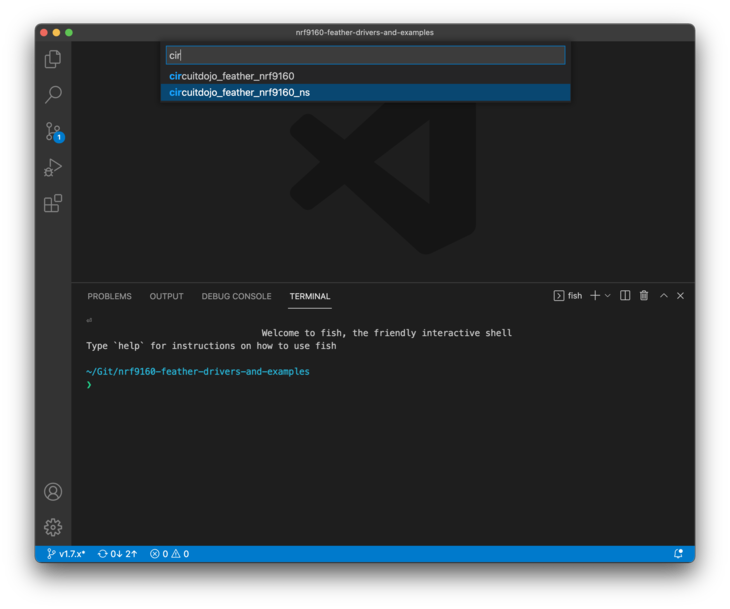
If prompted select the project path/to/your/project/nfed/samples/tracker and
type circuitojo_feather_nrf9160_ns as the target.
Then, load using the Zephyr Tools: Load via Bootloader task.
Note: again, make sure the device is in bootloader mode.
Pay attention to the progress in the bottom console.
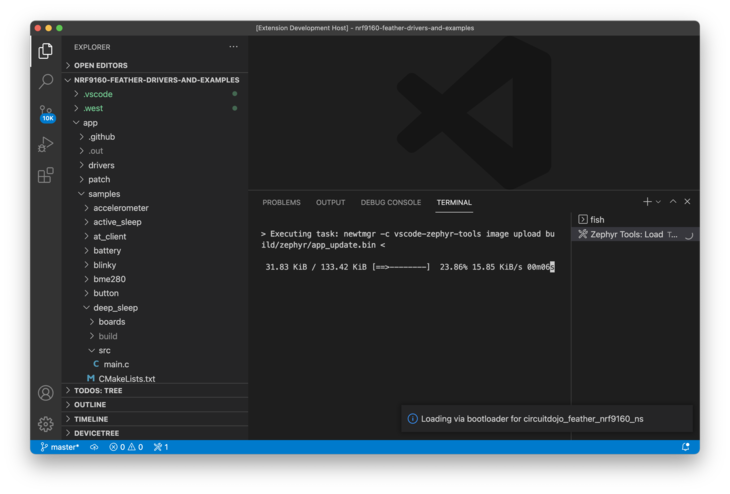
Once complete, the extension will reset your device and should start executing!
Viewing console output
You can then view the output using the Zephyr Tools: Serial Monitor command. You can also run Zephyr Tools: Load via Booloader and Monitor to both at the same time.
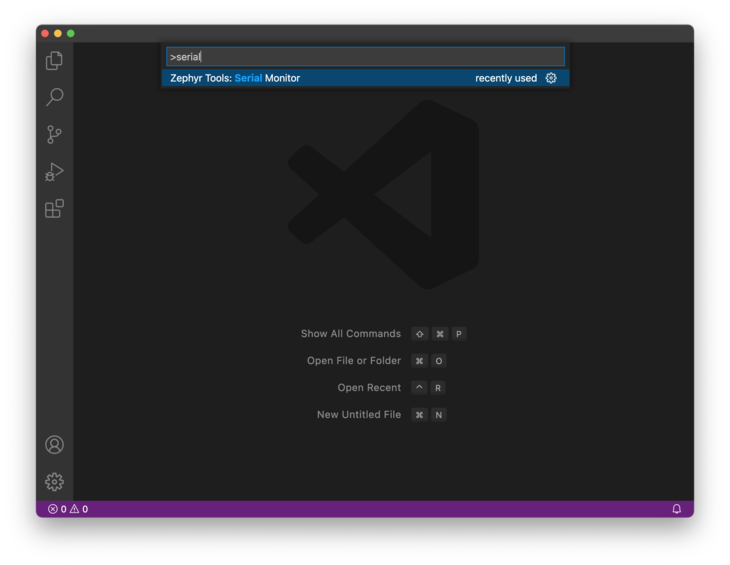
Make sure you select the port that corresponds to your device. On Mac the serial
port will be /dev/tty.SLAB_USBtoUART

Hello world
If you’ve made it this far, congrats. You definitely get a gold star ⭐️. While setting up a project may be difficult right now, everyone in the Zephyr and Golioth community looks forward to more tools that will make this setup trivial.
Now that it is setup, let’s get to the good stuff: talking to the cloud!
On connecting to Golioth, the demo code publishes the current UTC time to the LightDB boot entry. You can check it in your console by clicking on the LightDB State button.
Here’s what the serial output looks like:
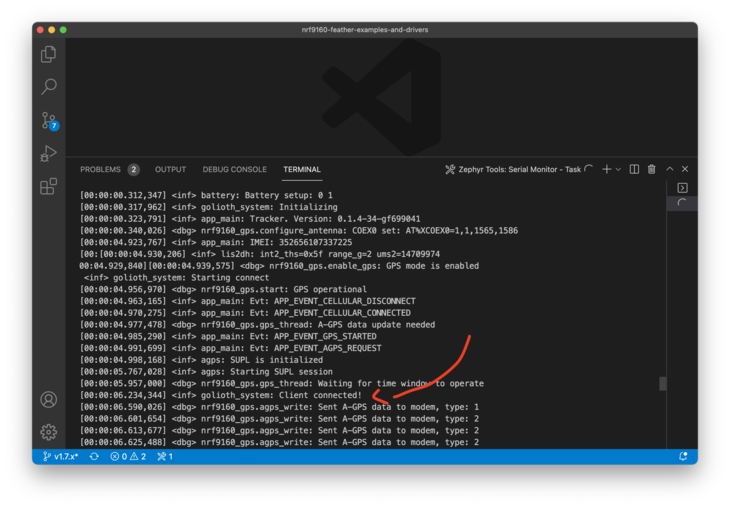
And on the cloud side:

Nice! We’re talking to Golioth’s servers!
Behind the curtain
Now, let’s see how it’s done!
First, i’m using an application-wide event manager and it’s being serviced by the main thread. Events can be generated anywhere within Zephyr and can be safely stowed (atomically) away into a message queue where they can be retrieved later.
When a “connected” event happens there is a few things that happen:
- Get the time
- Encode the time
- Publish to LightDB
Lets take a look at each
Get the time
The nRF Connect SDK has a great date_time library which is extremely useful
for getting the latest time directly from the cellular towers. You can then
check the time anytime you want using date_time_now().
err = date_time_now(&ts);
if (err)
{
	LOG_ERR("Unable to get current date/time. Err: %i", err);
}
A pointer to a uint64_t is passed to date_time_now in order to get the
current time. If the operation fails, the return value should be checked.
Encoding the boot data
The data by itself is not very useful. So I use the amazing power of CBOR to encode that data and prepare it to be sent via Golioth. In this example, i’m using QCBOR since its APIs are a bit more friendly. Here’s what it looks like:
int app_codec_boot_time_encode(uint64_t time, uint8_t *p_buf, size_t buf_len, size_t *p_size)
{
    // Setup of the goods
    UsefulBuf buf = {
        .ptr = p_buf,
        .len = buf_len};
    QCBOREncodeContext ec;
    QCBOREncode_Init(&ec, buf);

    /* Create over-arching map */
    QCBOREncode_OpenMap(&ec);

    /* Add timetstamp */
    QCBOREncode_AddUInt64ToMap(&ec, "ts", time);

    /* Close map */
    QCBOREncode_CloseMap(&ec);

    /* Finish things up */
    return QCBOREncode_FinishGetSize(&ec, p_size);
}
CBOR is extremely flexible and you can organize your data however you’d like. In
my case i’m creating the equivalent of {"ts":<TIMESTAMP>} in JSON.
I’m also a big fan of packing my CBOR. This can be done using function calls
like QCBOREncode_AddUInt64ToMapN. This allows you to use an index rather than
a string as the key in your encoded data. As long as your decoder understands
packed CBOR, you’ll save some serious bytes! (Which translates to $ for cellular
connections!)
See cbor/cbor_encode.h for all the options when using QCBOR.
Publishing to LightDB
Publishing to LightDB is as simple as running golioth_lightdb_set.
err = golioth_lightdb_set(client,
							GOLIOTH_LIGHTDB_PATH("boot"),
							COAP_CONTENT_FORMAT_APP_CBOR,
							buf, size);
if (err)
{
	LOG_WRN("Failed to gps data: %d", err);
}
You’ll notice that i’ve set a path to “boot”. Also, you’ll see that Golioth takes several different payload types including CBOR and JSON. This can give your application total flexibility how you want to send your data. (Nicceeee 💪)
GPS Sensor Data
Similarly, if you let the demo run long enough, you’ll notice that the nRF9160 Feather is attempting to get a GPS fix. Depending on the weather and other factors this may take seconds or minutes. Once a fix is achieved, the positional data is packaged up and pushed to Golioth.
Here’s an example output from checking using goliothctl
(Golioth’s command line tool)
❯ goliothctl lightdb get --id <YOUR ID> gps
{"lat":41.283409046551846,"lng":-72.81037240012303,"ts":1627413103000}
Every time you get a fix (currently set to 60 seconds) the nRF9160 will update LightDB with the latest location information.
Handy, no?
In the code
Here’s what the APP_EVENT_GPS_DATA looks like:
case APP_EVENT_GPS_DATA:
{
	uint8_t buf[256];
	size_t size = 0;
	struct app_codec_gps_payload payload;
	payload.timestamp = 0;

	/* Get the current time */
	err = date_time_now(&payload.timestamp);
	if (err)
	{
		LOG_WRN("Unable to get timestamp!");
	}

	/* Set the data */
	payload.p_gps_data = evt.gps_data;

	/* Encode CBOR data */
	err = app_codec_gps_encode(&payload, buf, sizeof(buf), &size);
	if (err < 0)
	{
		LOG_ERR("Unable to encode data. Err: %i", err);
		goto app_event_gps_data_end;
	}

	LOG_INF("Data size: %i", size);

	/* Publish gps data */
	err = golioth_lightdb_set(client,
							  GOLIOTH_LIGHTDB_PATH("gps"),
							  COAP_CONTENT_FORMAT_APP_CBOR,
							  buf, size);
	if (err)
	{
		LOG_WRN("Failed to gps data: %d", err);
	}

app_event_gps_data_end:

	/* Free the data generated before */
	k_free(evt.gps_data);

	break;
}
You can see it’s similarly structured compared to the initial boot message. The main difference being we’re using the GPS data that gets generated by the GPS module.
Here’s what’s generated by the GPS module for your use in the application:
struct gps_pvt {
	double latitude;
	double longitude;
	float altitude;
	float accuracy;
	float speed;
	float heading;
	float pdop;
	float hdop;
	float vdop;
	float tdop;
	float gdop;
	struct gps_datetime datetime;
	struct gps_sv sv[GPS_PVT_MAX_SV_COUNT];
};
You can see that i’ve taken advantage of the latitude and longitude but there are many other parameters that are extremely handy. The encoder can be updated to add any of these other parameters as your application sees fit.
One important note: I don’t use the gps_datetime from the GPS module itself
since it’s not easily computed to a uint64_t timestamp. It is particularly
handy if you want to generate a string representation of the timestamp:
struct gps_datetime {
	uint16_t year;
	uint8_t month;
	uint8_t day;
	uint8_t hour;
	uint8_t minute;
	uint8_t seconds;
	uint16_t ms;
};
Once you have the data and it’s encoded, we use the same golioth_lightdb_set
function. The main difference being we’re using the gps path.
In the end you have a reliable store of the latest GPS location saved across both cloud and device. Awesome, right?
Just getting started
This demo was just a small slice of how Golioth wants to make developing IoT infrastructure easier across many platforms. While they support Zephyr today, I’m particularly excited for future embedded Rust support.
While early in the development process, the CLI, web console and device API functionality has been great to use and I’m excited for more functionality and features in the future! As I mentioned at the start of this post, you can get started at https://golioth.io.
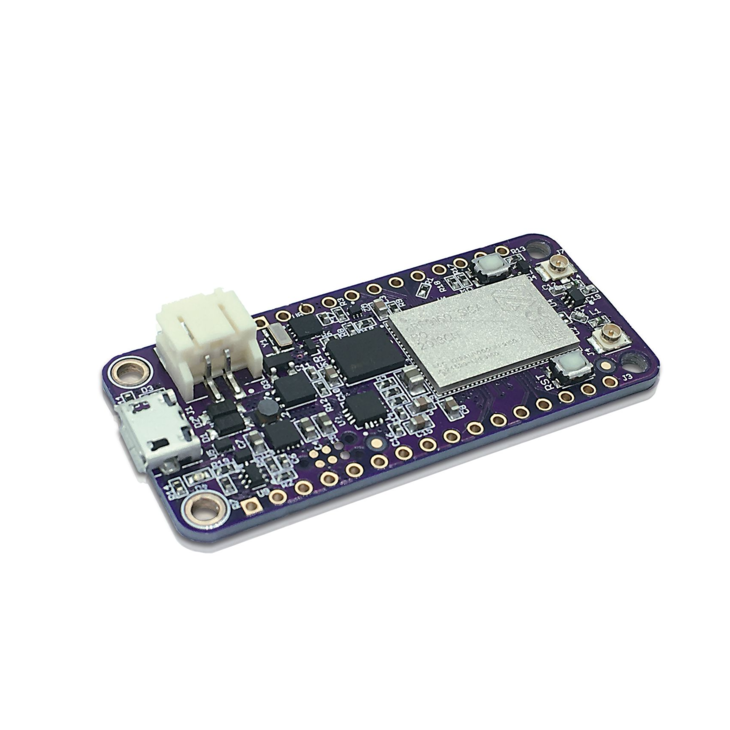
This post showcases the nRF9160 Feather which is available on my store, GroupGets, Digikey and Tindie. help support open hardware by consider grabbing one and joining the fun! ⚙️❤️
The source code related to this post can be found here.
Thanks to the one and only Chris Gammell and Jonathan Berri for their input on this post!
Last Modified: 2022.11.17